 |
| Easy Foamiran Flower Tutorial |
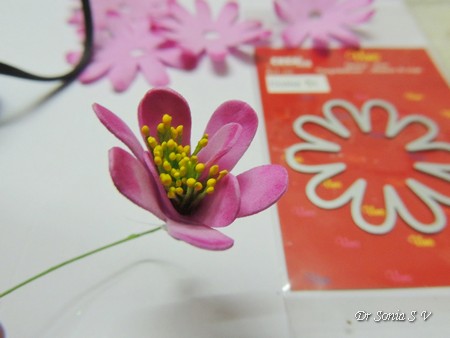
Hi friends...life has been super busy...but I am so happy to finally be able to squeeze in some time to share an easy foam flower Tutorial .This is a super easy method which does not require any heating but still yields a cute flower!
 |
| Easy Foamiran Flower Tutorial |
Foamiran Flower Tutorial
Materials
- Foamiran Sheets- these are foam sheets which are thinner than the easily available craft foam
- Flower Shapes- Hand cut or die cut foam flowers. I used Crealies Flower dies in this project.
- Inking Medium - Soft pastels or distress inks or anything else which you like- feel free to experiment!
- Adhesive- hot glue gun
- Pollen
I had tried shooting a Video Tutorial but it's been raining here in Bangalore and lighting has been very poor but since there are hardly any complicated steps ...I will share a step by step pictorial and hope you will bear with me!
1.Die cut flower shapes from foamiran - use 4-5 flower shapes to create one 3 D flower.
Tip :Die-cut 4-5 layers of foam in one go using your flower die- this not only helps save time but also helps to thin out your foam
 |
| Easy Foamiran Flower Tutorial |
2. After the optional step of inking your flower , fold the flower in half and half again as shown in the picture above.
3. Twist this folded flower between your fingers- this helps to spread your soft pastel shading and also makes your foam flower more wavy and pliable
 |
| Easy Foamiran Flower Tutorial |
4. Snip off a little from the pointed tip[ which is actually the flower center]
 |
| Easy Foamiran Flower Tutorial |
5. Open up and you have your basic shape to work with!
 |
| Easy Foamiran Flower Tutorial |
6. Do the same with 5 flower shapes[ please forgive the color difference in the steps below]
 |
| Easy Foamiran Flower Tutorial |
7. Tie or hot glue a bunch of pollen for the center. Snip one flower from the edge to it's center as shown below
 |
| Easy Foamiran Flower Tutorial |
8. Apply hot glue on the lower and middle part of one petal and place the pollen bunch on it and wrap the flower around the bunch of pollen...gluing as you wrap!
 |
| Easy Foamiran Flower Tutorial |
9. Press the base to shape the flower.
 |
| Easy Foamiran Flower Tutorial |
10. Insert this central part into other flower shapes...staggering the petals as you glue!
 |
| Easy Foamiran Flower Tutorial |
11. You can quickly make a nice fluffy flower by adding just 2-3 more layers!
 |
Easy Foamiran Flower Tutorial
|
I made a hanging decoration using the foamiran flowers , gorgeous papers form Lemoncraft and lots of Crealies dies. It has a flap and you can add a notebook inside if you want it to be functional!
 |
| Easy Foamiran Flowers |
The beautiful window was cut using a Crealies dies and actually opens and closes on its hinge.I used Crealies dies to cut the base and the layered circles. The angel is handmade using clay and a silicon mould. The cute bow was cut using Crealies dies and glitter foam.
 |
| Handmade Embellishment |
The crystal flower rests on a mosaic made with the Crealies Decorette XL no.12 die.
 |
| Hanging Decoration |
The little purple buds peeking from between the large flowers were also made using the same Crealies flower dies.
 |
| Foamiran Flowers |
Added faux leather tassels as danglers to complete the project!
 |
| Hanging Decoration |
I hope you liked the simple flowers and the project idea.
Products: From Crafters Corner : Papers : Lemoncraft, Foamiran Sheets, Polllen, Sizzix Big Shot, Soft pastels,Lace, Tassels Crealies Dies:


Nenhum comentário:
Postar um comentário