|
| Castle shaped card and box |
Dear friends this project is part of a "Birthday Celebration" set I made for my Guest DT post for Itsy Bitsy. The theme is weddings and celebrations.
At this stage in my life what we celebrate the most is my daughter's birthday.Last year we had a
Rapunzel themed birthday party and I concentrated so much on the
party decoration that I didn't give much thought to invitation cards or party favor boxes.
At 6 years birthdays are very important for her and all year long we have discussions on whom to invite [the list keeps changing weekly],what cake to make, what games to play etc etc !!
Princesses , Castles ,Pink and Purple are in vogue with my kiddo right now so sharing our pink and purple castle shaped invitation cards and
castle shaped box |
| Castle shaped Box |
Castle Shaped Box TutorialMaterials requiredCard stock - avoid handmade paper but use card stock
Adhesive : White glue. If you want to make lots of castle shaped boxes quickly or want to craft with kids use
double sided adhesive wonder tapes[also called tissue tapes] for the boxes and glue dots for the lids.
Scoreboard and scoring tool- optional...If you have it you get nice crisp folds easily and measuring is easy too.Otherwise use a scale and ball point pen.
Square punch-a must have unless you want to hand cut all those squares!
Castle Shaped Box Tutorial -Please click on the picture for the details[I have changed the view option to decrease page load time]You can jump directly to the box template or follow the steps on how I create it...then you can customize it to the size you want.
 |
| Castle shaped Box |
I started out with an A 4 card and scored it
every 2.5 inches[my box width] If you have a score-pal that translates to score at 2.5,5,7.5 and 10 inches.Then flip it and score at 5 inches if you want the box
5 inches tall.Score again at a 2.5 inch interval to get the
base of the box
 |
| Castle shaped Box |
Keeping approx 1 inch around the base square as shown chop off the extra card and snip off wedges as shown.
 |
| Castle shaped Box |
Fold along your score lines and apply glue or double sided tape [in white] as shown on the tabs.
 |
| Castle shaped Box |
I tried to make the base at different sites but if you make it in the style shown...its super easy to assemble the box by just peeling the tape and sticking in a step wise fashion as above.
 |
| Castle shaped Box |
It was so quick & easy that my daughter exclaimed that it was "easy peeasy" in typical kiddo slang!
To make the lid for the 2.5 inch wide box I used a 4.5 + 1/8 inch square card stock.Scored all around at 1 inch to get a lid that was of 1 inch height.Cut along the blue lines as shown.
 |
| Castle shaped Box |
Formula for lid of any sized box = a + 2 b +1/8 inch.Score all around by "b".
a= width of box ;b =height of lid.
 |
| Castle shaped Box |
Snip off wedges on the tabs to get a better looking box lid. Again sharing a tip to make it easy as well as save time..use
glue dots/drops.
I used to use Fevicol's glue drops but the size is often larger than what I require and I often have to cut it to size plus the paper is opaque so you cant really be sure where you are applying the dot..Fell in love with Itsy Bitsy's glue dots...which were so perfectly sized and since the backing paper is clear you know exactly where you are applying the adhesive!...A big bonus when working with kids!! |
| Castle shaped Box |
To make the "
castle like appearance" I punched a 2 x 11 inch strip card with the square punch.This gave an un-punched 1 inch strip on one side just right for my 1 inch height box lid.
 |
| Castle shaped Box |
Scored the square- punched card and stuck it to our box lid.This step needs a bit of care so little hands may not be able to do it!
 |
| Castle shaped Box |
Here is my little princess with her castle shaped boxes .
 |
| Castle shaped Box |
You could maybe personalize the return gifts writing each guest's name on his or her castle shaped box.
 |
| Castle shaped Box |
We added pink and purple embellishments to our castle shaped box
 |
| Castle shaped Box |
Made 2 smaller boxes using the same castle shape box template
 |
| Castle shaped box template |
My smaller box measuring 1.5 x 3.5 inches was made using a card 7 x 6 inches and scored 1.5 inches.
To use the template to make any size box :w = width of box,h =height of box and t = width of tabs[keep it 1/2 to 1 inch].
Width of card required = 4w +t.Height of card required =h+w+t
Width of punched square strip required =1 inch + width of lid of castle box  |
| Castle shaped Box |
In keeping with the theme we made party invitation cards as castle shaped cards.
 |
| Castle shaped card |
I made a pop up slider card in the shape of a castle.The central fort of the castle can be pulled up to reveal a space to write the Invitation and party details.
 |
| Castle shaped card |
Its actually rather easy to make simple or detailed castle shaped cards!
 |
| Castle shaped card |
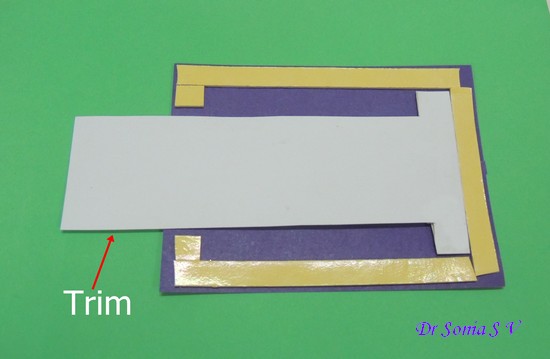
Here is link to the Castle Slider pop up card tutorial More linksBasic pop up slider card tutorial [the 1st tutorial on my blog....this one is the 111th!]
Other
Castle craftsSupplies:Big Shot , Embossing folders : Itsy Bitsy spots folder , Itsy Bitsy swirls.,Cuttlebug tiny mosaics, Dies: Itsy Bitsy Venetian die and Scallop circles, Provocraft Butterfly;Punches: square,tiara.Glitter alphas, Glitter strips,Boutique Butterflies,Wonder tape, Glue dots