RANDOM POSTS
Mostrando postagens com marcador Punch craft Tutorial. Mostrar todas as postagens

quinta-feira, 4 de junho de 2015

Craft Punches - Use , Care and Repair #crafts #diyprojects #homerenovacion #remodeling #homeimprovement #renovation #diy @verefazer


Before I got my Big Shot, I had a serious addiction to buying punches as you can see in this drawer packed full of punches!
Craft Punches
And I think because there are many posts on my blog dedicated to punch-craft, if you google Punch craft tutorials you will find quite a few links leading to this blog! I get a lot of mails asking for guidance on punches  so here is a back to basics post  focusing  on Craft Punches

What is a craft Punch?
I think all of us are familiar with the 2 hole punch we use to punch holes on papers to file them...well craft punches are just more sophisticated version of that.

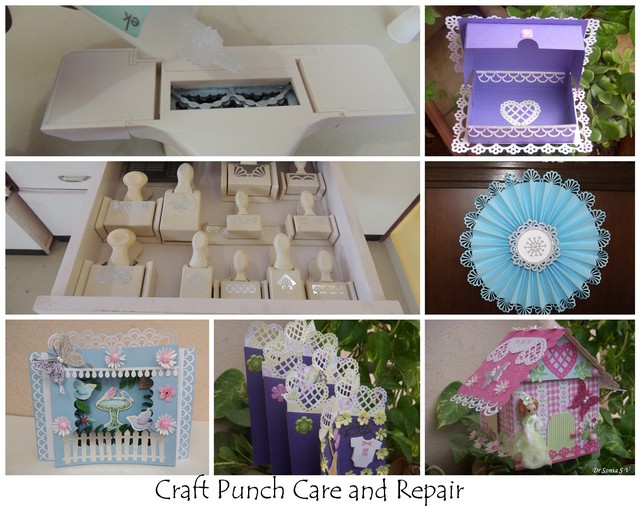
Here are some projects made using Craft Punches:
Cascading Card with Martha Stewart Heart Border Punch
Cascading Card
and Matching Hinged Gift Box with the 
Martha Stewart punch around the page Vintage floral punch

Fancy Fold Pop Up Card 
Pop Up card
which folds flat like this showcasing Martha Stewart daisy border punch
 Pop Up Card 
Flower shaped baskets made using the We R Memory keepers Flower Punch Board
Flower Punch Board basket
Huge Paper Daffodils made using the Flower Punch Board
Paper Daffodil


You  Can click on these links : Punch craft flowers and Punchcraft tutorials to see more projects using Punches
Tips on Using Punches
Using Punches is so easy you dont require any special skills but here are a few tips and tricks to get the best out of your punches

Surface to Punch

  • Try to keep the punch on a hard surface[ not on your bed] while punching
    Optimal Punching Action
  • You will get the best force with the least effort if you place your punch- paper on a sturdy table and use the palm of your hands to apply pressure on the punch [ arms extended with elbows only slightly bent so that you can exert the weight of your body and not strain your hands] 
  • If you have a lever punch you can hold it in your hand and punch but if at all it gives you trouble go back to punching on the floor or a table exerting pressure using your hand from above!
  • Paper to Use for Punches


  • A mistake most beginners make while using punches is assuming all papers will work with punches
  • The thickness and texture of the paper are important considerations for using punches 
  • Some punches work only with thin paper while some work better with thick paper like card-stock. 
Comparison of Punch Bunch and Martha Stewart 


  • Some punches will work best only with punch-craft paper. Most Punch Bunch , Jef Punches will not punch Card stock.
    Punch Bunch Craft Punches on card stock- poor punching!

    • If a Punch doesnt work on one type of paper try it with another thicker or thinner. Here you can see the same punches demoed above giving beautiful punched designs when I used them on thin smooth Punchcraft paper 
    • Punches on Punchcraft paper
      Martha Stewart Daisy Deep Edge Border Punch
    • Martha Stewart Border , Corner, and Punch around the Page Punches work beautifully with card stock and in fact don't work so well with thin or cheap quality paper
      Martha Stewart Beaded ruffle border Punch
      Papers to avoid with Punches
      • Handmade Paper - The fibers in most handmade papers don't cut well with punches.And not only punches many dies too dont cut well with handmade paper
      • Glitter Paper
      • Adhesive Backed Paper- you can use them with punches but adhesive can jam your punches so it is best to avoid.
      • Specialty papers like Thai paper , Metallic foil covered paper
      • Corrugated Paper
        Papers not to be avoided in Punchcraft
      • Fabric lined paper
      • Ivory Card stock- even Martha Stewart Punches dont punch ivory card stock though normal card stock punches easily with Martha Stewart Punches
      • Foam - to punch foam only use punches specially designed for foam otherwise your punch can jam hopelessly!
      Storage of Punches
        • Store your punches in a dry place not subject to lots of humidity to prevent them from rusting
        • Store your punches neatly arranged in a draw or box and not in a bag--well if you are wondering what is the problem with bags or throwing all your punches together...I once damaged a particularly loved punch by putting it in a bag along with some other punches and I was dismayed to find some plastic parts of  the punch broke due to all the jiggling around it was subject to and it stopped working!
        • Store your punches away from dust - I have seen many crafters from foreign countries proudly displaying their punches in the open. This is not a very good option for Indian crafters as most of us stay in places with a dust problem! Store in small / large plastic style cupboards or plastic boxes or cupboards.
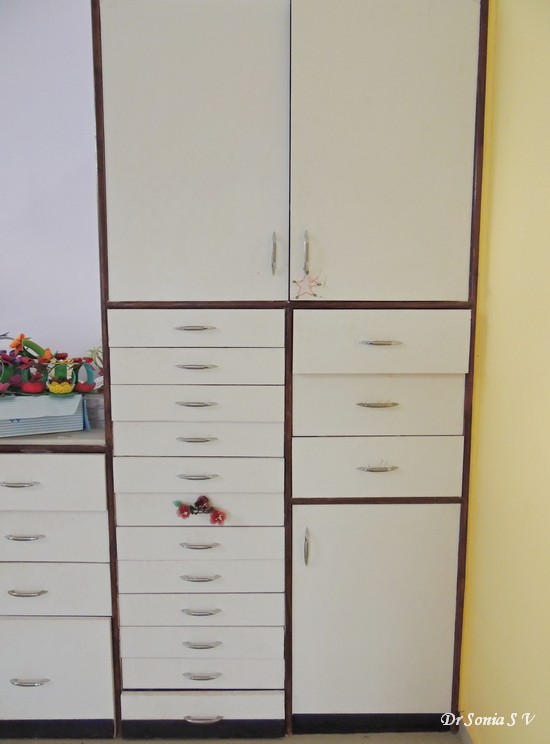
          Craft Room Cupboards
        I am lucky to have a hubby who not only tolerates but appreciates my crafting hobby and last year he designed cupboards for my craft supplies.
        Punch Storage
        He actually measured the height of my largest Martha Stewart Punch to design  perfect sized cupboard draws  to store my punches!
        Care  of Punches and How to keep your Punches in good condition
        If you are a seasoned crafter you must have read about the Aluminium foil tip to sharpen a punch ...well I had heard of it but was frankly speaking apprehensive to try kitchen aluminium foil or tin can [ suggested online!] on any of my beloved punches!
        I was thrilled to try out the Punch Revitaliser Kit by EK Sucess 
        The kit is quite small and handy and has
        1. several sheets of Wax paper 
        2. Aluminum foil sheets
        3. A silicone Lubricant
        How to sharpen your punches?
        Just like we can sharpen our kitchen knifes when they blunt with use we can sharpen our favorite punches too.
        I tried out the Aluminium foil sheets in the EK Sucess Punch revitalizer kit and I dont know if I am biased but I think after I punched the aluminium sheets with the punch and then tried it on paper it did create a more sharp edge to  the punch out. 
        Sharpen Punch with Foil
        My only gripe is that the Aluminium foil sheets are actually not very large so you need to be rather nimble in holding it while punching through the sheet.
        How to smoothen the  action of a Punch?
        Now the wax paper in the kit was something I loved and did notice a marked difference in action of the punch.
        Punch wax paper
        I am demoing the wax paper with a Punch Bunch punch. [My MS punches all punch smoothly as long as I use quality paper with them!].
        This particularly old leaf punch of mine has been vigorously used and doesnt punch smoothly.
        Punch wax paper
        I punched a single sheet of wax paper several times with it and I was pleasantly surprised to notice a marked difference in the ease and smoothness of the punching action!
        Smoother punching action
        You can also apply a few drops of the lubricant on the under-surface of the punch and let it rest for some time [ works in the same mechanism as oiling metal  parts of machinery!]
        Lubrication of Craft Punch
        Special tip from Shalini [owner of Crafters Corner] on solving Punch Problems : Humidity can play spoilsport while using punches. If you have any difficulty in punching a paper you could previously punch the fault may not be with your punch but the paper which had become damp while stored in our climate. You can iron / air dry the paper and try again!
        What to do if you jam up a punch ?
        Anyone who has used punches for some time would have had a jammed punch at some time or the other.
        Why does a punch jam?

        • A punch will jam if you dont exert enough pressure while punching and the partially punched paper catches in the punch mechanism [ hence the importance of using the punch on a hard, even surface and exerting adequate pressure with your palms!]
        • It will also jam if you try to punch through a thickness of paper too thick for the punch [ best solution to this is prevention!]
        • Trying to punch certain types of paper like handmade paper , adhesive paper and other papers listed above can jam up your punch
        • It may have more tendency to jam if it has not been used for some time [ punch parts are metal and just like any other machinery which has not been used for some time a punch needs a bit of lubrication to spruce it back to life!]
        • Ironically if you use a particular punch continuously too it has a tendency to jam [ solution to this is a bit of lubrication in between  batches of extensive punching projects!]

        How to release a jammed punch?
        If your punch jams up and the top punching mechanism does not bounce back to its normal position here are a few things to try

        • Place the punch on a table/ floor and try punching through the jammed paper exerting enough pressure through your palms with arms extended at the elbows [ so that your body weight exerts its force too]- you can try this several times
        • Give a gentle bang on the side of the punch - please exert due caution and dont be too rough and do try this as one of your last resorts only! I have actually had success in releasing a few naughty punches using the good old hit!
          Hit Punch on side
        • Use a pencil with eraser on top / any rounded thin but strong object to push back the plunger of the punch back up from the under surface of the punch.
          Blunt object to Push plunger from beneath
          If you have room on the under-surface of your punch this will be quite easy!
          Blunt object to Push plunger from beneath
          Be especially careful about your fingers while doing this as punch metal parts are sharp and you can cut your fingers!
          Under-surface of Martha Stewart Punch
          Choose an object which is not too big but can give you enough force to push up the plunger part of the punch. If your punch is a delicate one like the snowflake design shown above this technique is not going to be difficult!
          Jef Snowflake Punch
        • Try prising the jammed paper bits using a forceps /fingers /anything else !
        • I read on the net many crafters advising to put the jammed punch in the freezer to contract the metal and help release the jam but I think this is best kept as a last resort as the freezer is a damp area and the metal mechanism of your punch can rust if you subject it to such a moist environment!
        • If nothing else works and you lose all hope try opening it up - but a word of caution the spring mechanism inside many punches are dicey and tricky to reassemble and some punches are not easy to open up!
        • Some punches have screws to help open them up while others look impossible to open without hammering them apart!
        Now summing up - How to keep your Punches in good condition
        • Dont punch thick/specialty papers with it
        • Lubricate it to keep it punching smoothly
        • If you are going to carry around your punches, take care that they dont bang around and damage each other![pack well]
        Martha Stewart Daisy border Rosettes
          If you have a good quality punch it will be so easy to quickly make some "wow" projects such as these huge paper rosettes .      
        Frozen theme Party with Huge Paper Rosettes
        I used the MS Daisy fan deep edge border punch to make the paper rosettes as part of the party decorations for my daughter's Frozen themed birthday celebration recently.

        quinta-feira, 21 de agosto de 2014

        Handmade Paper Basket Tutorial #crafts #diyprojects #homerenovacion #remodeling #homeimprovement #renovation #diy @verefazer

        Handmade Paper Basket
                  Dear friends Thank you so much for the sweet encouraging words on my daughter's Stamping Fun post -- blogger friends are the best !! My little girl sat on my lap and read each and every comment last night! She was beaming!
        Now back to big girls' fun - sharing yet another easy paper basket made with the flower punch board.
        Paper Basket tutorial
                My paper basket is decorated with 3 butterflies which were stamped and heat embossed in sparkling gold embossing powder.Added gold liquid pearls to the center of the butterflies and added some sparkling gold and diamond chains [ recycled from a torn dress and also  used in the Felt Sunflower layout]

        How to make a Paper Basket

               I was so encouraged by the wonderful comments on the Paper Basket tutorial I shared earlier. This version of the paper basket is actually quite roomy and can be made in different sizes using the flower punch board. The basic idea is the same as the Paper Daffodils tutorial  
        Materials Required
        • Flower Punch Board -If you dont have a flower punchboard you could even free hand cut the scallops and follow the rest of the tutorial steps.
        • Scissors, Glue
        • Pattern Paper / Chart Paper , Card Stock
        • Optional : Punches, Dies, Embossing powders and Stamps to embellish your basket
        Take a 12 x 3 inch Pattern paper / chart paper and punch  out a strip aligning the score lines at “S” mark on the flower punch board.Score only the straight lines, don't score the diagonal lines at each punch.
        Paper Basket tutorial 
         You will get  a 8 petal  scalloped strip as shown
        Flower punch board tutorial 
        On the reverse side of your punched paper strip , score at 1 inch from the straight border using the flower punch board or a scoring board such as a Scorpal. If you are using the flower punch board line the scalloped edge roughly midway between the “L” and “M” marks on your flower punch board and score.
        Flower Punch board tutorial 
        At this stage if you wish you can further jazz up your paper strip by stamping and embossing like I did using a flourish stamp and sparkling snow WOW embossing powder.You can also add further interest to your paper basket  by inking  the edges of your petal strip using your favourite inks .
        Paper Basket tutorial 
        Once you have inked, embossed or glittered up your punched paper strip ,fold the strip at the score line as shown above
        Paper Basket tutorial  3
        Paper Basket tutorial
        Cut on the vertical score lines to reach the folded line just like you did for the paper daffodil tutorial [ but no need to snip off triangles this time].Curve and fold the paper strip and stick the last two petals together
        Paper Basket tutorial  4
        Paper Basket tutorial
        You will get a 7 petal cup shaped flower when you evert  the petal edges using the shaping tool of your flower punch board [ you can also use your fingers to evert the petal edges].
        To close the gaps in the center and convert your flower into a basket ,either stick a circle on the under-surface or within the flower cup or add a punch-craft flower like I did.You can make a 3 inch diameter “ XXS” flower using the flower  punch board and stick it to the center of your cup shaped flower to make a flower basket.
        Paper Basket tutorial  6
        Paper Basket tutorial
        Your flower baskets are actually ready. If you like baskets with cute handles  you can have even more fun designing fun handles for your handmade baskets
        Paper Basket tutorial  7
        Paper Basket tutorial
         I used a 10 and 3/4 inch x 1 inch pattern paper ,inked the edges and added a poppy stamps swirly curve die cut  on it and stuck it inside my flower baskets.

        Paper Basket tutorial  8
        Paper Basket tutorial
        Here is the finished basket with sparkling gold embossed butterflies and golden chains.Love how the light reflects from all the gold!
        Handmade Paper Basket
        I had lots of fun trying out different ideas on the basket handles.On this cheerful orange yellow version of the  paper basket I added a Martha Stewart punched pattern paper strip and a pom pom centred flower made using the flower punch board.
        Paper Basket 1
        Handmade basket
        Stuck the flower basket on a larger flat version flower again made using the flower punch board. Since I used green pattern paper to make the larger flower I think it looks like leaves dont you think!
        Handmade Paper Basket
        This has been a super long post but I didnt want to miss any detail so that anyone wishing to try making their own paper flower baskets would find it super easy!
        Handmade Paper Baskets
                  I hope you enjoyed this tutorial --from the comments to my previous posts I understand the flower punch board is a fairly new crafty tool and not many have it but the main purpose of this tutorial is just to give some fun ideas to create a 3 D basket plus give enough details to help those who already have / are planning to buy the  flower punch board !
        Do tell me how it is...hopefully didn't put you to sleep!!
        Supplies
        Punches : Flower Punch Board [ from Crafter’s Corner],  Martha Stewart Daisy,Martha Stewart  Vintage floral, Martha Stewart  Double arches
        Dies : Sizzix stamp and die-cut Butterflies 657773 , Poppy Stamps swirly curl border
        Stamps : Hero Arts Butterfly, Inque Boutique Monarch
        Embossing : Sparkling snow WOW embossing powder, Metallic Gold sparkle WOW embossing powder, Ranger heat gun
        Papers : DCWV Fresh floral stack, DCWV Four Seasons,DCWV Day to day Photo real stack,
        Misc : Gold Liquid Pearl [ from Crafter’s Corner]

        segunda-feira, 18 de agosto de 2014

        Easy Paper Basket Tutorial #crafts #diyprojects #homerenovacion #remodeling #homeimprovement #renovation #diy @verefazer

        Flower Basket tutorial 7
        Paper Basket Tutorial
                   Hi friends Thank you so much for the supportive comments  on my Felt flowers layout - I hardly scrapbook so each and every feedback was so important to boost my confidence!
                This month I am reviewing the  Flower punch board for one of my favourite Craft supply stores Crafter’s Corner and I wanted to try out different projects to make with this punchboard
        Here are links to 2 projects I had already shared using this new type of Punch board
                  Some ideas are "accidental" discoveries and when I found that the 7-  petal flowers made with the Flower punch board tend to stand upright , that gave me the idea to make flower baskets with them.
        Flower Basket tutorial 5
        Paper Basket Tutorial

        These Paper Baskets are quick and easy to make and will look good as home renovation decor or party favours. I can just imagine filling up the baskets with little trinkets or candy as return gifts for parties!

        How to make easy Flower Baskets

        Materials Required
        Flower  Punch Board - manufactured by We R Memory Keepers
        Flower Punch Board
        Glue , Scissors
        Pattern Paper /Chart paper and Cardstock
        Optional - Ink pad to ink the edges of your flower petals ,Stamps ,Embossing powders to jazz up your paper even more

        If you missed the Easy flower making tutorial do read it first to get familiar with the basic steps of how to use the flower punch board .
        Flower Basket tutorial
        Punch and  fold a  5 inch [S ] and 3 inch [XXS ]flower. The shimmer on the flowers is because I stamped and embossed the paper strips before making them into flowers
        Flower Basket tutorial
                  Make a 7 petal flower from the  folded strip you made for the 5 inch flower .Gently roll down the flower petals using the shaping tool included in the Flower punch board.Even though the flower can actually stand upright like a basket  you can make it  sturdier  by simply adding a cylindrical base to your flower basket .
        Flower Basket tutorial
        To make a base : Fold a 7 x 1 1/4 inch paper strip in half lengthwise[ you don't have to exactly follow this measurement!]. Glue the ends of this strip to get a paper ring. 
        Flower Basket tutorial
        Glue this paper ring base on to the under-surface of the flower.You need to be quite generous with the glue in this step and be patient to let the glue dry while holding the parts!
        Flower Basket tutorial
        Make a 7 petal 3 inch diameter flower following the Flower punch board tutorial and stick it inside your larger flower. If there is still a gap in the center just add a punched circle to the center.
        Flower Basket tutorial
        Make a handle using matching card stock - again no hard and fast rules about the measurement [I used 11 x 1 inch strip] and taper the ends as shown in the pictorial above to allow easy gluing into the basket.
        Flower Basket tutorial 3
        Paper Basket tutorial 
        I inserted the tapered ends of the handle under my smaller flower [ better to glue on the handle before you glue on the smaller flower!]
        Flower Basket tutorial 2
        Flower Basket tutorial 
        The picture above shows the Flower basket on its stand. I couldn't resist adding a Resin flower on the handle of my flower basket!
        Resin Flower
        Adding the resin flower tended to make my basket topple over [Oops!!!]
        So salvaged the project by adding a bouquet of flowers to the basket!
        Foam flowers Mulberry Flowers
        Poked foam flowers [ these are store bought ones but here is the handmade foam rose tutorial link], mulberry flowers and pollens [ these are normal pollens dressed up with floral tape] into play-dough [ instead of floral sponge!!] and added them inside the flower basket.
        Flower Basket tutorial 8
        Paper Basket Tutorial
        Using the same tutorial steps you can make baskets as large as 12 inches in diameter using the flower punch board!
        I hope you enjoyed the easy basket tutorial ....do tell me how it is.
        Supplies
        Flower Punch Board,Embossing : Versamark Watermark , WOW Embossing Powders , Ranger Heat Gun,Dies:Spellbinders Floral Oval ,PoppyStamps Swirly Curl border,Embellishments : Resin Flowers [from Crafters Corner]Paper : DCWV Floral stack
        Edited : This Basket tutorial was featured at Monday Handmade Linkup Party--- Thank you Judy

        Advertisement

        Related Posts Plugin for WordPress, Blogger...