|
| Desk Organizer with Handmade Flowers |
Hi friends...first of all my apologies for not visiting. At the end of this post I will share what has been keeping me busy!
This project is my DT post for Crafters Corner where I am showcasing the gorgeous array of glitters and pollen from
Dress My Craft.It is also my DT post for Cuttlebugmania Challenge where the theme is "Spring".
 |
| Handmade Flowers |
This project started off as a simple decoupaged desk organizer using gorgeous Graphic 45 papers. But it looked too mundane so I added lots of handmade lilies , matching flower buds and butterflies!
 |
| Handmade Flowers |
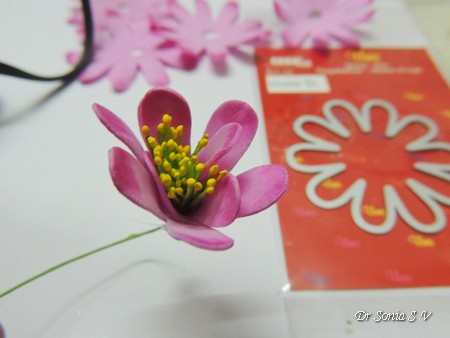
The lilies were made with Heartfelt creations Sunrise Lily stamps and dies .The Pink-peach ones are paper blooms made to sparkle using "
sparkling dust".The white lilies were made by stamping and heat embossing on parchment paper and the lovely centers are from the new
pastel pollen collection from
Dress My Craft . |
| Mini Bottle Charm |
The tiny bottle has "micro mini pearls" and "little hearts" both
Dress My Craft best sellers! I made the little butterfly sparkle beautifully using my favorite Rainbow glitter also featured in this earlier post :
Pop Up Box Card .
The beautiful range of glitters and pollen available now is simply amazing. I especially love the
styrofoam buds....not only are they fabulous to make rose buds, roses and other flower centers but they are fabulous to use as stand alone pollen too.
 |
| Styrofoam Pollen |
The styrofoam pollen is available in 2 varieties- pointed and round and in a lovely range of sizes .
Sharing a simple pictorial on how you can use them to custom make the perfect matching embellishments for your project.
 |
| Flower bud Tutorial |
Sponge the styrofoam buds in colors to match your project.
 |
| Flower bud Tutorial |
Apply a few drops of a tacky glue which dries clear. I bought this
Elmer's craftbond tacky glue recently and just loved that it was fluid enough to spread easily but tacky enough to hold all the glitters quickly.
 |
| Flowerbud Tutorial |
Smear the glue to get a nice even coating- using your little finger is the easiest option!
 |
| Flowerbud Tutorial |
Now the fun part- simply dunk the bud into a jar of rainbow glitter chunks .
 |
| Glitter Tutorial |
Swirl the bud and lift it up and voila you have a shimmering little flower bud!
 |
| Glitter Tutorial |
Stick the buds on foam/sponge and allow to dry.The Elmer's glue I used dries fairly fast so it's wonderful for impatient crafters!
 |
| Glitter buds |
In this project the glittering white buds were made by simply dunking the glue smeared buds directly in rainbow glitter chunks without coloring them.
 |
Handmade Flowers
|
The butterflies dotted all over the project were also given a lovely shimmer using rainbow glitter chunks.
 |
| Handmade Flowers |
The rainbow glitter chunks gives a more dazzling effect compared to rainbow glitter and the best part is you can use the exact hues you used on the rest of our project and hence make the perfect embellishments!
 |
Handmade Flowers
|
This technique of making your own flower buds / pollen is so fun! I experimented with the wide range of Dress My Craft glitters and loved the different effects I could achieve with different glitters!
 |
| Glitters |
I will show you the effect using microfine glitter.
 |
| Glitter Tutorial |
This time I used Aleene's glue - love this glue for a lot of projects but for this particular technique I like the more fluid elmer glue as Aleene's is thick and one needs to be more patient to get a nice even coating of glue without leaving lumps.
 |
| Glitter Tutorial |
Like earlier dunk the bud into glitter- used microfine glitter here.
 |
| Glitter Tutorial |
I love the subtle shimmery frosted look!
 |
| Glitter Tutorial |
I used Marianne die cuts on the central dividers and also gave them a subtle sparkle!
 |
| Desk Organizer |
I just love the beautiful papers from Graphic 45
 |
| Graphic 45 Papers |
It is always difficult to cut through your favorite papers but I think it is better to make something beautiful for the home renovation that you can look at everyday than hoard it inside a drawer!!
 |
| Desk Organizer with Handmade Flowers |
The beautiful centers of my lilies were made with lovely pollen bunches from Crafters Corner. I love you liked my spring themed desktop organizer. I dont know how practical it would be to use this but hehe it does look pretty doesnt it!
 |
| Desk Organizer with Handmade Flowers |
And here is the reason I have been so busy the past 2 weeks....meet the new member of our family 4 month old "Toffee" and hehe don't be deceived by his sweet name...he is one mischievous fella. He is such a naughty bundle that while I was making this project he managed to run away with the glue bottle, the sponge and even the scissors ! And yes he did munch one of the flowers too!!
 |
| Our Siberian Husky Toffee |
And back to crafty stuff dont forget to participate at the
Cuttlebugmania Challenge where the theme is "Use dies/embossing folder + Spring theme"
And here is the list of Supplies from
Crafters Corner Adhesives :
AleenesTacky Glue,E6000 Spray Adhesive, Elmers Craftbond Tacky Glue, Decoupage Glue- Mod Podge Die cutting Machine : Sizzix Big Shot