 |
| Foamiran Flowers Tutorial |
Hi friends, foam or rather the newly christened version paper thin " foamiran" seems to be quite the rage in the paper-crafting world right now especially with crafters who like to make flowers.
I have always loved crafting with foam but this is my first project using
foamiran.
 |
| Foamiran Flowers Tutorial |
My foam roses are the cutesy type and sparkle beautifully as they have been given a liberal dusting with distress glitter! Since they are my first attempt and I am still polishing my technique ,no two flowers turned out the same...hehe!!
 |
| Foamiran Flowers Tutorial |
Here are a few Crafty Tips :
- The rose is not the easiest flower to make and if you are working with foamiran for the first time ,make some simple flowers before trying a rose.
- Regular foam of the thin variety is much easier to work with compared to foamiran but yes foamiran is so much more delicate and can give beautiful results after a bit of practice!
- Foamiran tears easily so handle it gently!
Do first checkout these links to
Foam Rose Tutorials using regular foam:
And here are
Paper Rose Tutorials you may find useful to help make roses:
Foamiran Rose Tutorial  |
| Foamiran Flower Tutorial |
Materials- Foamiran Sheets- these are paper thin and very delicate . The sheets come in various colors but I would suggest investing in cream/ white rather than buying a lot of colors as you can easily color the cream/ white sheets
- Flower Shapes - handcut/ punch/ die cut. Because they are very thin you can die cut several flowers in one go and even handcut petal shapes quickly .
- Coloring Media- Distress Ink Pads , Archival ink Pads, Oil Pastels. I personally loved the color fastedness and ease of using oil pastels
- Iron Box - it is optional but so easy to use to quickly cup and shape your petals...extremely useful if you dont want to take the trouble to use embossing tools to shape petals.
- Adhesive- Glue Gun
 |
| Foamiran Rose Flowers Tutorial |
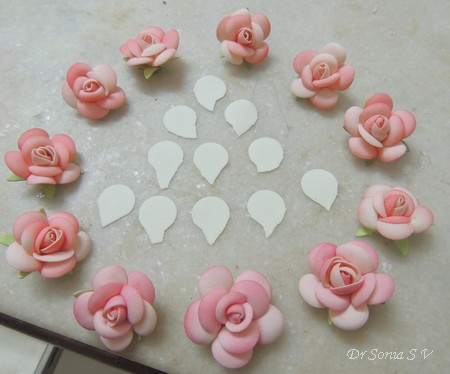
As you can see from the picture above no two roses look the same...well that was because I was experimenting which was the easiest and quickest way to make a decent looking rose! So in any step do add or subtract a petal to get the flower shape you are happy with!!
Flower Petals - I used a Sizzix die [ pictured above] to cut 5 petal flowers and hand tore the flowers to give individual petals. You can keep the flowers intact while attempting to make the rose but after much trial and error I found using individual tear drop shapes was the best way for me!
For starters try 1 + 2 + 3 + 5 petal layers from inside to outside to make your first rose.
 |
| Foamiran Rose Flowers Tutorial |
Coloring the petals is optional but fun! It's pretty easy if you have oil pastels and a sponge. For this technique coloring one side is good enough.
 |
| Foamiran Rose Flowers Tutorial |
Switch on your ironbox to it's maximum and press a petal onto it..in seconds the petal will cup and you can then let it fall onto your table.
 |
| Foamiran Rose Flowers Tutorial |
When you work with foamiran for the first time you will be amazed at how magical this step is!! The ironbox does the embossing and petal shaping for you quickly and effortlessly!!
 |
| Foamiran Rose Flowers Tutorial |
An even quicker way is to press whole flower shapes onto the ironbox before you tear them into petal shapes. Just remember to color the flowers/petals before using the iron as it is quicker to color a flat shape than a cupped one.
 |
| Foamiran Rose Flowers Tutorial |
For the following steps a video would have been ideal but it was too tricky So hope you bear with me and follow the pictorial !
 |
| Foamiran Rose Flowers Tutorial |
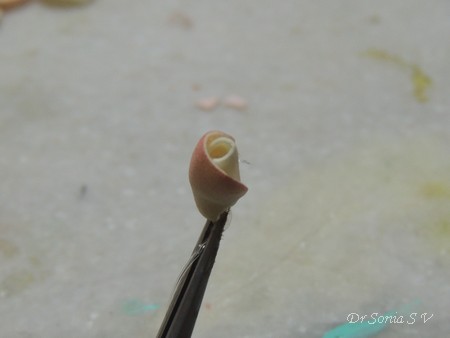
Twirl a single petal as shown above and glue it applying just a tiny bit of hot glue on the inner side.
 |
| Foamiran Rose Flowers Tutorial |
Glue two petals to encircle the central bud.
 |
| Foamiran Rose Flowers Tutorial |
Depending on how big your central bud is add 2 or 3 encircling petals.
 |
| Foamiran Rose Flowers Tutorial |
Dont add a lot of hot glue...just a tiny painting with your glue gun should be enough and add glue towards the middle part of the petals only.
 |
| Foamiran Rose Flowers Tutorial |
Arrange your outer 5 petals and glue in place adjusting the position as you go along!
 |
| Foamiran Rose Flowers Tutorial |
Again be sparing with the hot glue and adjust with a bit of pulling and squeezing to get the rose shape you are happy with.
 |
| Foamiran Rose Flowers Tutorial |
And here is my tiny bouquet in a mini flower vase!
 |
| Foamiran Flowers Tutorial |
I hope you liked my foamiran roses and the Tutorial !
 |
| Foamiran Flowers Tutorial |
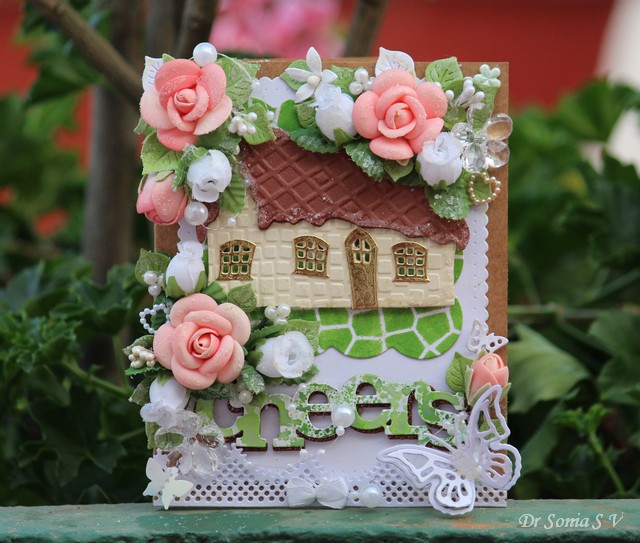
Supplies : Dies : Sizzix Bigz Floressa,Cheery Lynn Flourish 13,Cheery Lynn Large Rose,Cheery Lynn Mini butterflies ,X cut 3 D Butterfly,Winnie and Walter Cheers Cutaway , Winnie and Walter Essentials Audrey Cutaways ,Spellbinders Big Scalloped Squares, Dee's Distinctively Small Winter Cottage,Magnolia Doohickeys Vintage Box Lacing Coffee,Elizabeth Craft Designs 728 Bunch of FlowersEmbossing Folders: Cuttlebug squares ,Sizzix DiamondsStencil :Carabelle Studio Vitrail Stencil


Nenhum comentário:
Postar um comentário