Shaped Card Tutorial |
| Chariot Shaped Card |
This card is specially made for my friend Beckie's Blog Hop.I have a "
princess obsessed" 6year old little girl at home renovation and this card was entirely inspired by her and I would say even designed by her!
 |
| Chariot shaped box |
The picture shows my little one's
chariot "design" and the
chariot shaped box we made according to her design!
 |
| Chariot shaped box |
She twirled paper strips on her fingers and added one of my quilled teardrops to make a topper for her chariot!I was stunned how she managed to make the final 3 D paper craft resemble her original design!!
 |
| Chariot shaped box |
I wanted to make a more sophisticated version of my daughter's chariot shaped box for my friend
Beckie's blogversary hop but life and work got in the way and with just hours to her hop going live, I had to whip up this simpler version of a chariot shaped card.
 |
| Chariot Shaped Card tutorial |
Making this card was so simple I cant believe I had the basic framework in minutes!
Chariot shaped card tutorial- Cut 2 large circles for the body of the chariot
- Cut 4 small circles for the wheels. If you want it even simpler just use 2 wheels either on the front or back of the chariot card.
- Optional step: cut a window on one of the large circles
- Cut off a small potion from the top of the circle which will be the back of your chariot card .This helps your chariot shaped card to open and close perfectly.
 |
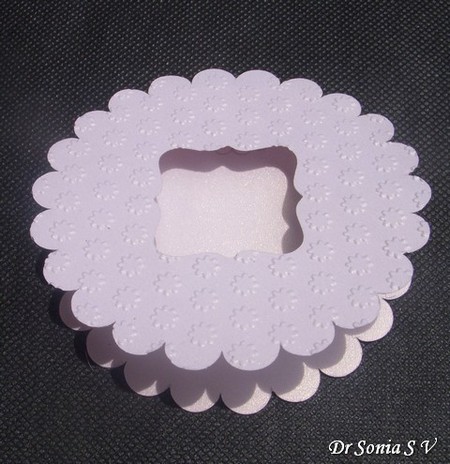
| Chariot Shaped Card tutorial |
- Adhere a small piece of folded card [need not be a circle] on it as shown in the picture of the shaped card tutorial
- Apply glue on the top leaf of your folded card piece and adhere the front circle of your chariot shaped card.
I punched out a flower to add a design to the wheel and created a topper and curtains using the heart punch.Used photo paper to make some punchcraft flowers.
 |
| Chariot Shaped Card |
Stamped a Happy Birthday Princess [Princess stamp gifted by my dear friend
Priya Sivaraj] on the back of the chariot shaped card.
 |
| Chariot Shaped Card |
This is the inside of the chariot shaped card.
 |
| Chariot Shaped Card |
To make it even more girly, I made a bow using organza ribbon and added it to one of the wheels of my chariot.
 |
| Chariot Shaped Card |
My
little critique was not too pleased with my adaptation of her chariot design and said I used the
wrong embossing design [she is more familiar than me with all our embossing folders] and also accused me with a "
you copied me"!! Ha Ha I had to take her to my draft post and show her I was giving her credit!! [My God are all 6 year olds like this !!!]
Supplies:Big shot,Nesting dies,embossing folder,pearlised paper,flower punch.Edited: This card came top 3 at BGC and got the Ooo La La award at My Sheri Craftsand was featured at Itsy Bitsy


Nenhum comentário:
Postar um comentário