 |
| Hinged Box |
Hi friends , Thank you so much for the lovely comments on my Onam post!! Sharing a hinged box I made with dies and some simple mixed media techniques!
 |
| Partitioned Hinged Box |
The box as such measures 5 x 3 inches and is made from a single piece of cardstock measuring 9 x 7 inches and I made customised partitions for the inside .
The cardstock is scored on the 9 inch side at 1, 4, 5 and 8 inches and on the 7 inch side at 1 and 6 inches.  |
| Hinged Box Tutorial |
Wedges are cut off for neater and easier gluing .Here is the link to the detailed Tutorial :
Hinged Box Tutorial  |
| Hinged Box Tutorial |
I used the
Spellbinders Labels 8 die to die cut the base and lid of my box. As I wanted a sturdy box I layered 2 pieces of card stock under the pattern paper.
 |
| Hinged Box Tutorial |
Stencilled a design using texturing medium
Whipped Spackle and the
Memory Box Texture Adornment Stencil. |
| Hinged Box Tutorial |
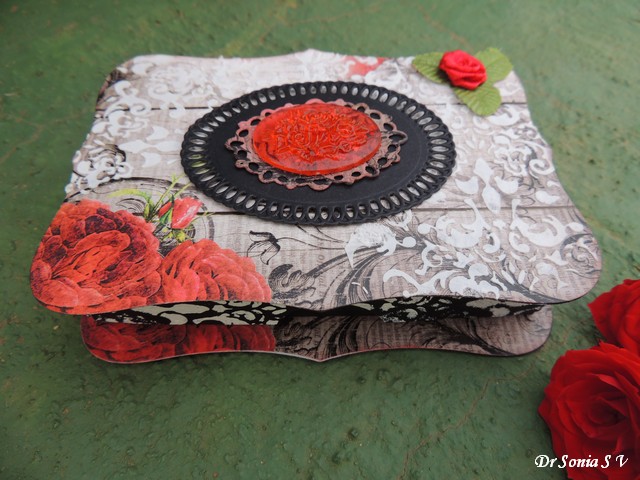
The paper I used was so pretty I kept the embellishing to a minimum! Added a homemade resin cabochon [ made using resin and alcohol ink in a silicon mold] on an oval die cut.
 |
| Hinged Box |
Couldnt resist a tiny ribbon rose on the corner of the box!
 |
| Hinged Box |
And here is the box with real roses from our garden!
 |
| Hinged Box |
Supplies : All from Crafters CornerDies : Spellbinders Labels 8, Spellbinders Elegant OvalsStencil : Memory Box Texture Adornment Stencil Papers : Bob n Betty


Nenhum comentário:
Postar um comentário